Why you should consider starting a greenhouse on your small farm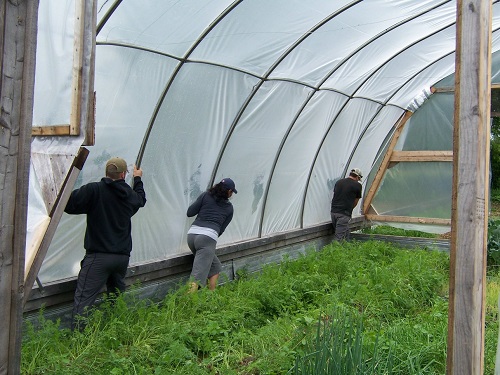 Farm crew moving my hoophouse on rails Farm crew moving my hoophouse on railsStarting a greenhouse was a natural offshoot of my Community Supported Agriculture (CSA) market garden business; I built my movable greenhouse on rails (a la Eliot Coleman) as well as a lean-to greenhouse and a small version built from cattle panels. Here's my experience working with them, so you can evaluate the benefits of starting a greenhouse for yourself.
Greenhouse construction
My movable greenhouse (actually a hoophouse) is mounted on wooden rails that are a little more than twice the length of the hoophouse itself. I buried flashing (used steel roofing) around the base of the rails to keep out rodents.
I also installed a ventilation fan in one end wall. The entire hoophouse, including the end walls, is covered by a single layer of poly. In Canada, the company I have used for many years is Harnois Greenhouses. They have great prices for greenhouse plastic. In the US, check out the selection of greenhouse plastics from Bootstrap Farmer. They also offer a DIY hoop house kit that includes the plastic cover. You can read my review here. 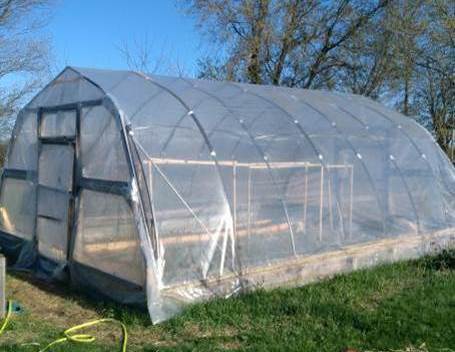 My greenhouse on rails My greenhouse on railsMy lean-to is built from the same hoops; we used half-hoops framed against the south-facing gable end of one of my outbuildings. The base frame is a 10' x 16' rectangle built out of 2x8. The top of the half hoops are secured to a ledger beam about 11 feet up the wall. End wall framing is made of 2x4 bolted to the hoops. 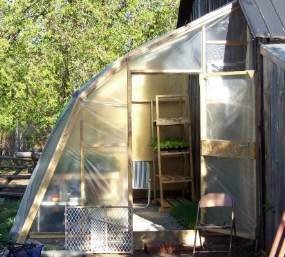 My little lean-to is very useful for plant starting in spring My little lean-to is very useful for plant starting in springGreenhouse Planting
When I considered starting a greenhouse, I knew I wanted a movable design. Being able to easily move the greenhouse to a new location effectively doubles the greenhouse growing area. I can also take advantage of seasonal and site-specific growing conditions.
Free Market Garden Start-up Guide
 The consumer demand for fresh local organic food has never been higher. Bad news on the supply chain is good news for local growers. Get my free Organic Market Gardener Start-up Guide and see if this is the right time to launch your CSA market garden business. Enter your best email and the guide will be sent to you right away. Here's my basic movable greenhouse planting planBeginning in early spring (first week of March in my area, still lots of snow on the ground) I built raised beds in the hoophouse. The 20-foot width of the hoophouse allowed me to construct 5 beds. I left about 2 feet between the side walls of the hoophouse and the first beds; this was to provide some distance from the outside cold and also to allow room for me to grow flats of transplants and bedding plants there later in the season.
I did leave a few broccoli in the hoophouse, to see how they would fare compared to the outdoor garden. The broccoli plants in the greenhouse were harvest-ready 3 weeks before the ones I transplanted out.
They were ready 4 weeks before the first harvests from the outdoor garden. This early harvest alone was enough to justify starting a greenhouse.
Then I will move it back to the first position, where I will have planted more hardy crops for the fall. This second move means I get triple use from my little hoophouse.
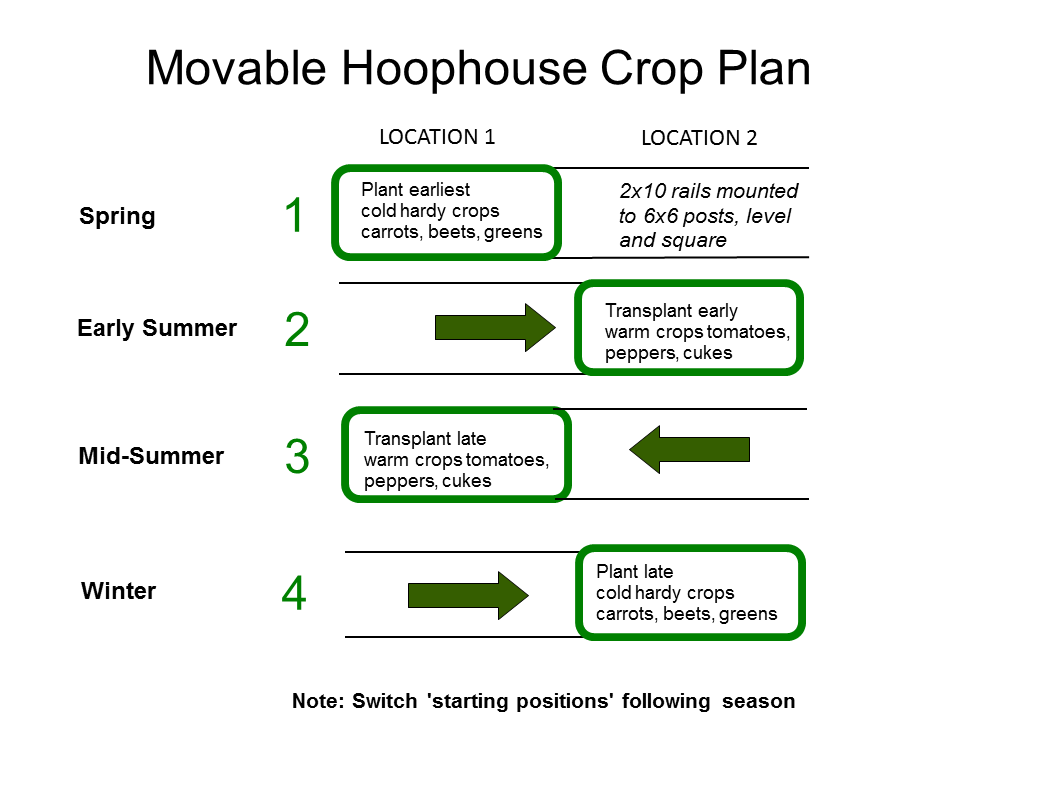 Each 'move' takes about 2 hours with some helpers Each 'move' takes about 2 hours with some helpersGreenhouse ProductionDoes this greenhouse production justify the the time and expense? At the time, my movable greenhouse (if every component was bought new) would cost less than $2,000. Hoophouses are usually constructed on a base, so the incremental cost to make it slidable (some more 2x6 and 2x4 for the additional length of rail, more used steel flashing) was about a couple hundred dollars. For this incremental cost (about 10%), I got triple the growing area of a fixed greenhouse.
Other links of interestHere's my curated list of micro-farm equipment for the small grower Check out some great products for farmers and gardeners here farm grown reviews This is a pretty good article about Urban Survival. More Resources for the Small GrowerChapter 9 - Seven Cash Cow Crops: The Self-Sufficient Backyard Raise chickens, pigs and a productive organic garden: The Homesteader Book Bundle If you can find 50 sq ft you can have fresh egg for breakfast (and maybe barter): The Eggs Factory If you need to build it on your homestead, the plans are here: 16,000 Woodworking Plans
|
See Something You Like? Share!
Got questions to ask, stories to tell?
Share your organic market gardening question, or comment, or story.
Recent Articles
-
Best Chicken Coop and Accessories for Small Farms and Homesteads
Nov 15, 25 03:35 PM
Looking for the best chicken coop? Here are the top coops, accessories, nest boxes, and gear to build a safe, productive poultry setup. -
Farm grown reviews of products recommended by New Terra Farm
Nov 07, 25 06:25 AM
Find great farm and garden products in my farm grown reviews -
Community Supported Agriculture Marketing Ideas To Sell Out The Season
Nov 05, 25 05:18 AM
Authentic Community Supported Agriculture marketing ideas to grow loyalty, boost sign-ups, and sell out your CSA every year


